How to Build a Coffee Table from Scratch
Learn how to build a coffee table from scratch with this complete DIY guide. Includes tools, materials, techniques, and expert steps to create your own masterpiece.
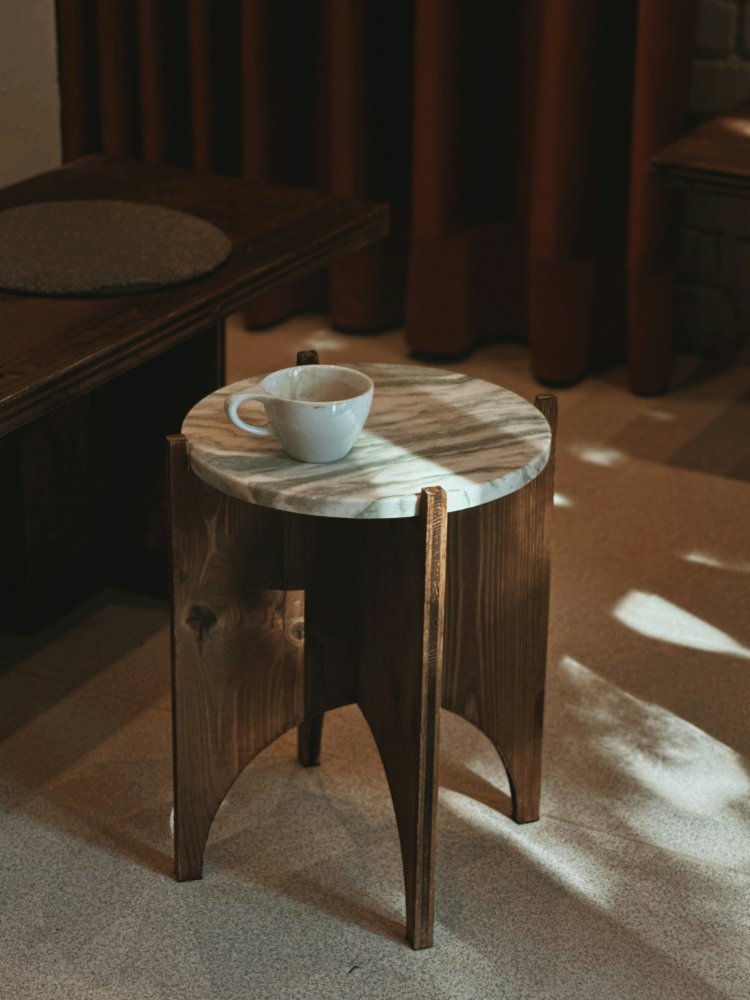
How to Build a Coffee Table from Scratch
Building a coffee table from scratch isn’t just a budget friendly alternative to store bought furniture it’s also a fulfilling project that lets you shape your home’s style with your own hands. Whether you're a seasoned DIYer or just starting out, this guide will walk you through practical, stylish, and budget conscious methods to construct a unique coffee table that fits your needs and reflects your personal aesthetic. Coffee tables serve as the centerpiece in most living rooms, blending function and design into a single item. A DIY coffee table can be customized to any shape, size, material, and finish, making it one of the most versatil furniture projects for beginners and experienced builders alike. Plus, building your own furniture is often far more affordable than purchasing high end designer versions. With a little creativity and some essential tools, you can build something beautiful and functional no fancy carpentry skills required.
Choosing the Right Wood Type for Your Project
When starting your DIY coffee table, the choice of wood is crucial. Common options include pine, oak, walnut, and plywood. Pine is affordable and easy to work with, but it may dent easily. Oak is strong and has a beautiful grain, making it great for rustic designs. Walnut, while more expensive, brings a rich, dark tone perfect for modern or luxurious spaces. Plywood can be a budget friendly option for minimalist styles. Consider how the wood color and texture will fit with the rest of your room decor. Durability, finish potential, and ease of cutting and sanding should also factor into your decision. Ensur the wood is dry and free of knots or warping. If you’re upcycling wood from pallets or old furniture, make sure it's clean and smooth. Testing stains or paints on a scrap piece of the same wood will help avoid unexpected results.
Measuring and Planning Your Coffee Table Dimensions
Accurate measurements are the backbone of any successful DIY project. First, consider the space where the coffee table will be placed. Ideally, your coffee table should be about the same height as your sofa cushions typically between 16 and 18 inches. The table should be at least 18 inches away from the sofa edge to allow for legroom and movement. Sketch out your design on paper or use free design software to visualize the layout. Decide on your table’s length and width most standard coffee tables are around 48 inches long and 24 inches wide, but this can be customized depending on your space. Use graph paper to make a scale drawing that includes placement for legs, storage shelves, or other features. A solid plan helps prevent wasted materials and rework later on.
Gathering Tools and Materials Before You Begin
Before cutting or assembling anything, gather all necessary tools and materials. Basic tools include a measuring tape, saw (hand saw or circular saw), power drill, screws, wood glue, sander, level, and clamps. Materials include your chosen wood, screws or nails, wood filler, stain or paint, and a clear sealer. Optional tools like pocket hole jigs or a miter saw can make your build even easier and more precise. Safety gear is equally important wear safety glasses, gloves, and a dust mask, especially when sanding or cutting wood. If you're working in a small space, consider a drop cloth or plastic sheeting to catch sawdust. Organization is key lay out all your tools and materials in an accessible area to streamline your building process and reduce frustration.
Cutting Your Wood Pieces with Precision
With your plan and measurements in hand, it’s time to begin cutting your wood pieces. If you're using a circular saw, ensure you’re making clean, straight cuts by using a straight edge or guide. A miter saw is especially helpful if your design includes angled cuts or joints. Label each cut piece according to your plans this minimizes confusion during assembly. Always double check your measurements before cutting. Remember the carpenter’s rule: measure twice, cut once. If you're not confident with cutting, consider having your local hardware store cut the boards to size, as many offer this service. Neat, consistent cuts ensure that your coffee table will sit level and stable when assembled.
Assembling the Coffee Table Frame
Begin the assembly process by building the table frame, starting with the sides. Apply wood glue to each joint, then screw or nail the boards together for added strength. Use clamps to hold the pieces in place while the glue dries. A carpenter’s square helps ensure corners are at perfect 90 degree angles. Attach support pieces across the bottom or middle if your design includes a lower shelf or needs added stability. Use a level to check that the frame sits evenly on all sides. Take your time during this step rushing can lead to misaligned joints or wobbly construction. If you're using pocket holes, they’ll provide stronger, hidden joints that look more professional.
Designing a Storage Friendly Coffee Table
Functionality is just as important as style when crafting a DIY coffee table from scratch. A storage friendly design not only saves space but also reduces living room clutter by providing a convenient place to store books, magazines, remotes, or even throw blankets. One popular and practical option is to incorporate a shelf beneath the tabletop or include drawers in the base. Start by sketching out how much storage you need and choose materials that can handle the weight and frequent use. Plywood or solid hardwood are great options for a sturdy base and shelving unit. If drawers are too advanced for your skill level, a bottom shelf framed with slats or solid panels is a much easier option and still offers generous room. Measure carefully to ensure your storage compartments are accessible without compromising legroom or foot space. A good design will blend form and function seamlessly where storage doesn’t just exist but enhances the overall look of the coffee table. Adding a stain or finish to match your living room decor helps it integrate naturally into the space. Whether you’re hiding away clutter or showcasing a decorative basket of throws, the addition of storage can transform a simple table into a hardworking, stylish centerpiece.
Choosing the Right Finish for Your Wood
The finishing touch on your DIY coffee table can make all the difference between a homemade piece and a professional looking centerpiece. Choosing the right wood finish not only protects your table from daily wear and tear but also brings out the beauty of the wood grain, highlighting all your hard work. There are several options to consider oil finishes like tung or Danish oil give a natural, matte appearance while deeply nourishing the wood. Polyurethane finishes, on the other hand, offer a hard, protective coat that resists scratches and spills, making them ideal for households with kids or pets. You can also explore stains if you want to adjust the color of the wood to better match your interior. Always test your chosen finish on a scrap piece or an inconspicuous part of the table to make sure it gives the desired result. Use a clean cloth or brush to apply in thin, even coats, and sand lightly between coats for a smooth, refined surface. Allow ample drying time as per the manufacturer’s instructions. Finishing is not a step to be rushed it seals in your craftsmanship and extends the life of your coffee table, so give it the attention it deserves.
Incorporating Glass or Epoxy Resin for Modern Appeal
If you’re seeking a sleek, contemporary look for your DIY coffee table, integrating glass or epoxy resin elements can add a touch of sophistication and uniqueness. Glass inserts in the tabletop can create an airy, open feel, making your space appear larger and more refined. You can choose between frosted, clear, or even colored glass depending on your desired style. Epoxy resin offers even more customization it can be poured over natural wood to create a glossy, durable surface or used to fill in designs and patterns like river tables or ocean themed art. The key to success with glass or resin is precision and preparation. Glass inserts will require accurate cuts in your wood surface and a secure frame to hold the glass safely in place. Resin, on the other hand, needs to be mixed properly, poured slowly, and given time to cure often over 24 hours. Using painter’s tape and a level workspace will help avoid spills and uneven surfaces. These materials do require a bit more investment and attention to detail, but the final product is often stunning a bold blend of rustic and modern that instantly elevates your living room.
Staining Techniques to Highlight Grain Patterns
A beautiful stain job can elevate the appearance of your DIY coffee table and showcase the natural charm of the wood grain. Before staining, it's crucial to prepare the surface by sanding it thoroughly using fine grit sandpaper, removing any blotches or imperfections. Clean off the dust using a tack cloth or vacuum with a brush attachment, ensuring the surface is spotless before applying the stain. Choose a stain that complements your room's color scheme while also enhancing the wood's unique grain. Gel stains are excellent for beginners as they are thicker and easier to control. For a more dramatic effect, consider applying a pre stain wood conditioner to ensure even absorption. Apply the stain with a clean cloth, sponge, or brush, always following the direction of the grain to maintain a consistent finish. Allow the stain to penetrate the wood for a few minutes before wiping off the excess. You can apply multiple coats depending on how deep or rich you want the color to appear. Each layer should be dry before adding another. Finish with a sealant such as polyurethane to protect the stain and add sheen. These techniques not only add beauty but also increase the durability and lifespan of your coffee table.
Creating a Rustic Look with Reclaimed Wood
Reclaimed wood brings character and history to your DIY coffee table project, making each piece one of a kind. Often salvaged from old barns, fences, or flooring, reclaimed wood offers rich textures, weathered finishes, and eco-friendly benefits. Start by sourcing your wood from reputable salvage yards or even home renovation sites. Before using, inspect the wood carefully for nails, bugs, or mold and clean it thoroughly. Sand the surface lightly to remove dirt while preserving the natural aged appearance. Plan your design around the wood’s unique imperfections knot holes, color variations, and rough edges add authenticity to the rustic charm. You can enhance these features by using a wire brush to create more texture or applying a light wash of white or grey paint for a distressed finish. Joinery should be kept simple think visible screws, exposed bolts, or wood pegs to align with the rustic aesthetic. A clear matte sealant will help protect the wood without compromising its raw beauty. Building with reclaimed wood may require more flexibility in design, but the result is an environmentally friendly, deeply personal table full of warmth, history, and handcrafted appeal.
Paint or Stain
Once your table is assembled and sanded to a smooth finish, it’s time to add color or accentuate the natural grain with stain. Choosing between paint and stain depends on the aesthetic you’re going for. Paint provides bold, solid coverage and can complement a modern or playful design. In contrast, wood stain allows the natural beauty of the wood grain to shine through, enhancing the organic look. Begin by using a clean cloth to wipe down any dust. Apply a wood conditioner if needed, especially for softer woods like pine. This step ensures even stain absorption. If painting, start with a primer to seal the wood and allow better paint adhesion. Use a quality brush or foam roller to apply thin, even coats, sanding lightly between coats for a smooth finish. Allow each coat to dry fully as per manufacturer instructions. If staining, brush or wipe the stain onto the surface following the wood grain, then wipe off the excess with a clean cloth. You can build up the depth of color by adding additional coats. Don’t forget to stain or paint the underside if the table will be visible from low angles. For best results, always work in a well ventilated area or outdoors and wear protective gear such as gloves and a mask. This step may take time, but the payoff is a vibrant, personalized table that reflects your unique taste and style.
Seal and Protect the Surface
After you’ve painted or stained your coffee table, sealing it is critical for durability. Daily wear from drinks, books, decor, and feet can damage untreated surfaces quickly. A good sealant will protect your work from moisture, stains, and scratches. Choose between polyurethane, lacquer, or water based polycrylic, depending on the look you want and how much protection you need. Polyurethane is durable and available in gloss, semi gloss, or satin finishes, but it can yellow over time on light paints. Water based polycrylic dries faster and is less likely to yellow, making it ideal for lighter finishes. Apply your sealer using a high quality synthetic brush or foam brush. Work in thin coats, following the wood grain, and allow each coat to dry thoroughly. Sand lightly between coats with very fine sandpaper or a sanding sponge to ensure a smooth final finish. Typically, two to three coats offer strong protection. Avoid rushing the drying process; curing times may vary by product. Let the table cure for a few days before placing any objects on it. This final layer not only ensures your table can stand up to daily use but also gives it a polished, professional appearance. With the sealing done, your handmade furniture becomes a lasting centerpiece for your living space.
Add Drawers or Storage Features
If you want your coffee table to be more than just a surface, consider incorporating storage options like drawers, cubbies, or a lower shelf. Storage can help organize magazines, remotes, or coasters, reducing clutter and enhancing functionality. For drawers, you’ll need to measure and cut panels precisely to fit within your frame. Use wooden runners or metal drawer slides to ensure smooth movement. Cubbies or open shelving can be created by adding cross supports and additional panels below the tabletop. Remember to factor in how these features will affect your table's structure and aesthetics. It's also important to use strong wood glue and screws to hold storage elements in place since they will endure daily use. For added flair, you can install decorative handles or knobs on drawers. Storage features also open opportunities for personal expression consider lining the inside with wallpaper, paint, or decorative paper. If your design is modern, go minimalist with handleless push to open drawers. For rustic styles, a wooden crate style drawer may look perfect. While this step is optional, it significantly elevates your project by combining design with utility. You’re not just making furniture you’re creating a custom solution tailored to your living habits and taste.
Install Decorative Legs or Casters
The legs of your coffee table are more than structural they’re a huge part of its style. You can choose straight, tapered, hairpin, or turned legs based on your aesthetic preferences. Consider metal hairpin legs for a mid century modern look or thick, turned legs for a farmhouse feel. If mobility is important, you can also attach casters (wheels) to the bottom. This is particularly useful for smaller spaces where moving furniture frequently is necessary. To install legs, measure and mark evenly where each one should go on the bottom of the table. Use mounting plates or brackets if your leg style requires them. Secure with screws and test for balance by placing the table upright and gently rocking it. Check that all legs touch the ground evenly and adjust as needed. When using casters, make sure they’re rated for the weight of your table and lockable to prevent rolling. Decorative legs and casters not only affect functionality but can drastically change the entire vibe of the room. This simple yet thoughtful step completes your piece with personality, helping it stand out while remaining practical. It’s one more reason building your own furniture is a rewarding DIY journey because every detail is entirely yours.
Apply a Custom Design or Inlay
If you're looking to take your DIY coffee table to the next level, consider adding a custom design or inlay. This can transform a plain tabletop into a statement piece. You could use stencils, decals, mosaic tile, epoxy resin pours, or hand drawn designs using paint pens. Inlays using materials like metal, tile, or contrasting wood inserts create a luxurious look. Plan your design in advance by sketching or taping it out. If doing a stencil, secure it firmly before applying paint to prevent bleeding. For epoxy inlays, build a frame around the area and pour resin into grooves filled with stones, glass, or even LED lights. Ensure that the surface is level, as uneven pours can ruin the look. Sand any rough spots after drying and apply a final sealant over the design to protect it. These added elements bring creativity and artistry to your coffee table. They don’t just beautify it makes the table distinctly yours. This is a great opportunity to personalize the project with symbols, patterns, or messages that resonate with your home decor or cultural taste. A well executed design or inlay turns your table into more than a piece of furniture it becomes a conversation piece.
Let It Cure Before Use
Patience is critical during this stage. Once your coffee table is painted, sealed, and decorated, resist the urge to use it immediately. Allowing proper curing time ensures durability and protects all your hard work. Curing refers to the full hardening of paint, stain, and sealant not just the time it takes to feel dry to the touch. Depending on the materials used, this could take anywhere from 24 hours to several days. Review product instructions carefully for guidance. During this period, avoid placing anything on the table or sliding it around. Even seemingly light pressure could leave marks, smudges, or even dents. A fully cured finish is less likely to chip, scratch, or absorb stains. This step is especially crucial if you live in a humid environment, as moisture can prolong curing times. If you applied multiple layers of finish, be even more cautious. Letting your table cure properly is like letting concrete set or dough rise it’s the invisible step that guarantees strength and longevity. Taking the time to let everything settle ensures your handmade table holds up beautifully over time and maintains its fresh, flawless finish long after it's placed in your home.
Style Your Coffee Table
Now comes the fun part styling your new coffee table. A beautifully styled table enhances your living room’s overall vibe and invites compliments. Begin with a base like a decorative tray to anchor your display. Use a combination of heights, shapes, and textures for visual interest books, vases, candles, coasters, or small potted plants work well. Don’t overcrowd it; leave space for function. You’ll want room for cups, remotes, or your feet. Use items that reflect your interests travel souvenirs, handmade crafts, or framed photos. Seasonal accents are another way to keep things fresh add pinecones and plaid in winter or seashells and florals in summer. If your table has a lower shelf or drawers, style those as well for cohesive design. Consider symmetry for a classic look or asymmetry for a modern, eclectic feel. It’s also helpful to rotate styling pieces periodically to avoid visual fatigue. Your coffee table is now the heart of your living space show it off. Styling adds that finishing touch, making it feel less like a project and more like an intentional centerpiece that blends practicality with design.
Photograph Your Project
Capturing your completed coffee table in well lit, high quality photos not only preserves your accomplishment but also helps you track your DIY progress. It’s satisfying to compare your final result with your early sketches or inspiration photos. Use natural light from windows, avoid harsh flash, and take shots from multiple angles including close-ups of details like joinery or design features. Stage the room around it with clean surroundings and simple styling. Consider before and after shots if you’re planning to post your creation online or keep a personal DIY portfolio. You might even inspire others to take on similar projects. Use props like a cup of coffee, a book, or cozy throw to give the table life in your images. Share your results with friends or on social media for feedback, encouragement, or tips. A beautiful photo can turn a simple DIY into a source of pride or even a new hobby or side hustle. You never know this coffee table may be the first of many woodworking projects you take on.
Maintenance Tips to Keep It Looking New
Once your coffee table is in use, regular maintenance will keep it looking as great as day one. Start by using coasters and placemats to prevent water rings, stains, or scratches. Wipe the surface regularly with a soft, damp cloth to remove dust and avoid buildup. Avoid abrasive cleaners; stick to mild soap and water when necessary. Periodically check the table for loose screws, unstable legs, or any signs of wear. Reapply a sealant coat once a year or as needed to protect the finish. If your table is painted, touch up chips or scuffs with leftover paint. For stained wood, you can use wood polish or wax for an occasional refresh. Also, consider rotating decorative items to prevent fading or uneven wear in specific spots. With proper care, your DIY coffee table can last for many years. It’s more than a functional piece it’s a reflection of your craftsmanship and creativity, deserving of care and attention.
Celebrate Your Work and Share Your Story
You’ve just completed a hands on project from raw wood to refined furniture. That’s worth celebrating! Whether it was your first attempt or you're an experienced builder, each step you followed added value to your skill set. Take time to appreciate the journey, the mistakes you overcame, and the new techniques you’ve learned. Share your story online or with friends, family, or local DIY groups. Your experience might inspire someone else to begin their own project. Sharing also helps you reflect on what worked, what didn’t, and what you might do differently next time. Celebrate by inviting guests to enjoy coffee on your handmade table or planning your next woodworking challenge. This isn’t just a piece of furniture it’s proof of what you can achieve with time, effort, and creativity. So, sit back, put your feet up, and admire your work. You’ve built more than a coffee table you’ve built confidence, knowledge, and pride.
Your Coffee Table, Your Masterpiece
Building a coffee table from scratch is a fulfilling project that combines practical skills with creative vision. From selecting the right materials to finishing with personal touches, each stage gives you full control over the final product. You’re not just saving money; you’re crafting a durable, stylish, and meaningful piece that reflects your personality. Whether it's your first furniture build or one of many, the result is something to be proud of. This coffee table isn’t just a functional centrepiec it’s a lasting symbol of your ability to turn an idea into a tangible, useful, and beautiful reality. Keep building, keep learning, and never underestimate the value of what your own two hands can do.
Photo by Alexandra Leru on Unsplash
What's Your Reaction?