How to Make Your Own Floating Shelves Complete DIY Guide
Learn how to make your own floating shelves with this step-by-step DIY guide. Discover materials, tools, styles, installation tips, and decorating ideas to upgrade your space.

How to Make Your Own Floating Shelves Complete DIY Guide
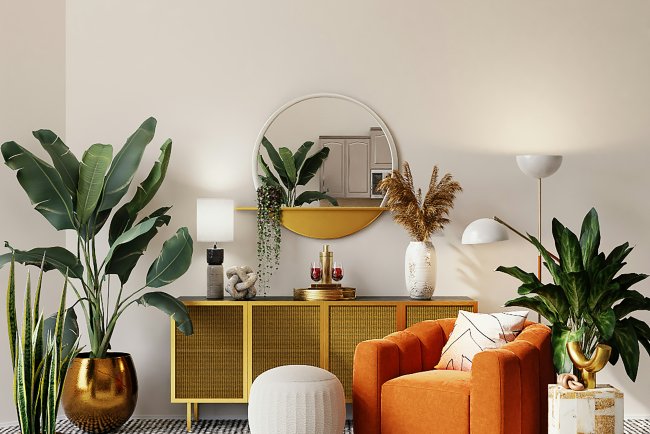
Floating shelves have become a staple in modern home decor, not just for their stylish minimalism but also for their ability to combine form and function seamlessly. Unlike bulky bookcases or floor based storage units, floating shelves give your space a clean, elevated look while maximizing vertical real estate. From displaying family photos and travel mementos to organizin kitchen supplies or holding your favorite books, they can be customized for every room and every purpose. The beauty of building your own floating shelves lies in the flexibility to choose your materials, sizes,finishes, and arrangements to suit your aesthetic and practical needs. Whether you live in a small apartment or a large house, these wall mounted wonders bring a sense of openness, organization, and sophistication. In this detailed guide, you’ll learn how to craft floating shelves step by step with various styles and techniques. Each section will explore design considerations, materials, tools, and tips to help you confidently complete your project. So roll up your sleeves and prepare to transform your walls into something both beautiful and useful.
Choosing the Right Spot for Your Floating Shelves
Before you grab any tools, the first and most important decision is where to place your floating shelves. Assess the purpose of the shelves are they decorative, functional, or a bit of both?Think about which room you’re enhancing and what kind of items you plan to store or display. For example, floating shelves in a kitchen may hold spices or glass jars, while those in a living room might showcase books or artwork. Take note of natural light, nearby furniture, wall space, and traffic flow to ensure the shelves won’t feel overcrowded or in the way. Mark the area with painter's tape to visualize the size and spacing. Consider symmetry and balance, especially if you're installing more than one shelf. Use a stud finder to locate wall studs for support, as this affects placement and stability. Planning ensures your shelves will not only look great but also serve their intended function without causing damage to your walls or frustration down the line.
Selecting the Right Wood and Finish
Material choice plays a key role in how your floating shelves will look and hold up over time. Pine, oak, and poplar are popular wood types because they’re easy to work with and offer durability without breaking the bank. For a more rustic appeal, consider reclaimed wood, which adds character and sustainability. Choose a finish based on your room’s decor natural wood stains enhance the grain and give a warm tone, while painted surfaces offer a crisp, clean look. Decide whether you want a glossy or matte finish depending on lighting and surrounding textures. If the shelf will be in a kitchen or bathroom, make sure to use moisture resistant wood and finishes to avoid warping. Sand your wood thoroughly before applying any stain or paint, and always test your color or finish on a scrap piece. A well-chosen and well finished piece of wood elevates the shelf from a functional item to a piece of decor.
Tools and Materials You'll Need for the Job
Before you start building, gather all the necessary tools and materials to ensure a smooth process. Common tools include a circular saw or hand saw, a drill, screws, wood glue, a stud finder, a level, measuring tape, sandpaper, and a screwdriver. Depending on the shelf design, you might also need a pocket hole jig, clamps, or wall anchors. For materials, besides your chosen wood, you’ll need brackets or a hidden mounting system (if making true floating shelves), along with finish materials like paint, stain, or polyurethane. Investing in quality screws and anchors ensures your shelves will stay firmly mounted. Having everything at arm’s reach before starting saves time and reduces frustration during the build. Safety gear like goggles, gloves, and ear protection should also be part of your toolkit. Preparing your workspace with good lighting and a flat surface is just as important to keep your build accurate and efficient.
Measuring and Cutting Your Wood Accurately
Precision is key when it comes to cutting the wood for your floating shelves. Begin by measuring the space on your wall where the shelf will go, then subtract any allowance needed for mounting brackets or wall space. Mark your wood using a pencil and a square to get perfectly straight lines. Use a circular saw, table saw, or miter saw to make clean, accurate cuts. If you don’t own a saw, many hardware stores offer cutting services when you buy wood from them. Label each piece after cutting, especially if your shelves require multiple components. It's a good practice to cut all your pieces at once and then double check their uniformity before assembling. Sand the cut edges to smooth any roughness or splinters. Clean, consistent cuts are essential for structural integrity and give your shelves a professional, seamless look when mounted.
Assembling the Shelf Box or Structure
Depending on the design, floating shelves can be solid wood or hollow box-style for a true floating effect. A hollow shelf typically consists of a U-shaped or rectangular box that slides over a wall mounted bracket. To build this structure, use wood glue and screws to attach the top, bottom, and side panels. Pocket holes on the back or underside will keep screw heads invisible. Use clamps to hold pieces together as the glue sets and to prevent shifting. Double check that corners are square to maintain symmetry. Once assembled, give the whole structure a light sanding to ensure smoothness and prepare it for staining or painting. If using solid wood, simply sand, stain, and drill mounting holes directly into the board. A well assembled shelf ensures long term strength and adds polish to your finished piece.
Prepping and Finishing the Wood Surface
After assembly, it’s time to prepare the wood surface for finishing. Start by sanding all areas with medium-grit sandpaper (120 to 150), followed by fine grit (220) to get a silky smooth texture. Wipe off any dust using a tack cloth or damp rag. For staining, apply wood conditioner first to ensure even absorption. Use a foam brush or cloth to apply your stain in the direction of the wood grain, then wipe off any excess. Let it dry fully before applying a protective coat like polyurethane or shellac. For painting, use a primer first if your wood is unfinished or porous. Once dry, apply multiple thin coats of paint with a foam roller or high quality brush for a smooth finish. Allow adequate drying time between coats. A properly finished surface not only looks great but also protects the wood from moisture, scratches, and daily wear.
Building and Installing Hidden Brackets
True floating shelves appear to "float" because they are mounted on hidden brackets that are concealed within the hollow shelf box. You can purchase metal floating shelf brackets or make your own using dowels or wood strips. If DIY-ing, secure wooden cleats to the wall using long screws anchored into studs. The shelf box should fit snugly over the bracket. Drill pilot holes in the shelf to slide onto the mounting pegs or cleats. Make sure the bracket is completely level before installing the shelf. Test the fit carefully it should be tight enough to hold without wobbling but not so tight that it damages the shelf or wall. Hidden brackets create a sleek, seamless look and add a touch of elegance to your space while supporting a surprising amount of weight when properly secured.
Mounting Your Shelves Securely on the Wall
Installing your floating shelves is where your project truly comes to life. Before you drill into the wall, double-check the position and use a level to ensure your placement is straight. Mark the locations for your mounting bracket, ideally anchoring into wall studs for maximum stability. If a stud isn’t available, use strong drywall anchors rated for your shelf’s weight capacity. Use a power drill to secure the bracket, making sure all screws are tightly fastened. Once your bracket is in place and level, slide your shelf onto the bracket or cleat. Apply construction adhesive inside the shelf if desired for extra grip. Check the final position with a level again after mounting. Press gently but firmly to ensure a snug fit. This final stage is where craftsmanship meets visual impact, and once secured, your floating shelf should feel as solid as any built-in piece of furniture.
Adding Decorative Hardware or Trim
While floating shelves typically aim for a minimalist look, adding decorative trim or corner brackets can elevate the aesthetic. You can attach wood molding to the edges to give the appearance of a thick, solid beam or use antique-style metal brackets for a farmhouse feel. These elements are especially helpful if your home decor leans toward traditional or rustic. They can also cover minor imperfections or seams if your woodworking wasn't perfectly flush. Choose finishes that match other elements in the room, like light fixtures or cabinetry. Although technically optional, these enhancements allow you to tie your new shelves into the broader design language of your space and make your project look custom built by a pro.
Styling Your Shelves Like a Designer
The art of shelf styling is just as important as the construction itself. A well-built shelf can lose its charm if it's cluttered or unbalanced. Aim for variety in both height and texture. Combine items like books, plants, ceramics, candles, frames, and small sculptures. Group items in odd numbers, using the "rule of three" for visually appealing arrangements. Leave some negative space so the eye can rest and the objects can breathe. Consider a color palette that complements the room or introduce pops of contrast for visual excitement. Mix horizontal and vertical elements to keep things dynamic. Swapping decor seasonally also helps keep your shelves looking fresh year round without having to rebuild or repaint.
Making Corner Floating Shelves for Unused Spaces
Corners are often neglected, yet they hold great potential for added functionality and flair. Corner floating shelves can be made using triangular or L-shaped wood pieces fitted into the wall junction. These shelves are especially useful in small kitchens, bathrooms, or bedrooms, offering extra storage without taking up floor space. Build them similarly to regular floating shelves but adjust the dimensions to fit snugly. You may need custom brackets or a hidden cleat that spans both walls. Paint or stain them to match adjacent shelving for a cohesive look. Corner floating shelves make otherwise wasted space useful and can dramatically improve the aesthetics and utility of a tight room.
Creating a Floating Shelf Bookshelf Wall
Instead of a traditional bookcase, consider creating a full bookshelf wall using rows of floating shelves. This minimalist approach creates a striking visual feature while holding dozens of books, frames, or even electronics. Measure your wall and plan the spacing of each shelf carefully. Ensure the brackets can handle the weight of multiple books, which can be surprisingly heavy. Uniform shelves give a structured and modern feel, while staggered ones add a playful touch. This setup works wonderfully in reading nooks, living rooms, or offices and turns your wall into a gallery of knowledge and character.
Making Floating Nightstands for Bedrooms
Floating shelves aren’t limited to living areas they’re also perfect as minimalist nightstands in small bedrooms. A thick wooden shelf mounted beside the bed can hold a lamp, alarm clock, phone, and book without taking up precious floor space. Hide wires through the back of the shelf for a clean look. Add a small drawer if desired using basic joinery techniques. This project is ideal for small bedrooms, studio apartments, or guest rooms where you need functionality with minimal furniture. A floating nightstand makes your room feel airy and modern while still providing everything you need within reach.
Incorporating Lighting into Floating Shelves
Add drama and functionality to your floating shelves by incorporating built-in lighting. LED strips or puck lights can be installed on the underside of each shelf to create ambiance or spotlight decorative objects. This is especially useful in dark hallways, entertainment rooms, or kitchens where both beauty and practicality matter. Battery operated lights simplify installation, but you can also run wiring through the wall for a seamless look. Choose warm or cool light depending on your room’s color palette. Integrated lighting takes your shelves to the next level, turning them into a hybrid of furniture and architecture.
Floating Shelves in the Kitchen for Open Storage
In the kitchen, floating shelves can replace upper cabinets for an open, airy vibe. Use them to store dishes, mugs, jars, or spices. Choose moisture resistant wood or finish to withstand humidity. Keep heavier items like plates near the bottom and lighter ones up top for safety and balance. Arrange items by function or color to add a decorative element. You’ll also find it easier to access daily use items without opening doors. Kitchen floating shelves help open up small spaces while offering easy access and display potential for everyday items.
Bathroom Floating Shelves for Clean Organization
Bathrooms are another great place to install floating shelves, especially when floor space is limited. Use them to hold towels, toiletries, and decorative accents. Choose waterproof materials or use a polyurethane finish to resist steam and water exposure. Mount shelves above the toilet, sink, or bathtub for extra storage without making the room feel crowded. Incorporate baskets or jars for organizing smaller items. Floating bathroom shelves help reduce clutter and improve organization while enhancing the room’s design and functionality.
Making Floating Desks for Home Offices
Combine storage and workspace by building a floating desk, essentially a larger version of a floating shelf. It can be installed in small rooms, closets, or under staircases to create a hidden office area. Reinforce the shelf with heavy-duty brackets or hidden metal supports to handle the weight of a laptop or desktop. Add cable grommets or cord management to keep your work surface tidy. Pair it with a comfortable chair and some wall mounted accessories, and you've got a compact yet efficient workstation without bulky furniture.
Using Floating Shelves for Entryway Storage
Your entryway sets the tone for your home, and floating shelves can help you keep it neat and functional. Install a few near the door for keys, sunglasses, mail, and small plants. Add hooks below for bags and jackets, or build a floating bench with storage underneath. Choose sturdy wood and make sure it's mounted securely to handle regular use. Entryway floating shelves offer practical storage in a tight space while allowing for personalization with seasonal decor or family photos.
Seasonal Styling and Maintenance Tips
To keep your floating shelves looking fresh and relevant, consider updating their decor with each season. Swap in new colors, textures, or thematic items like pumpkins for fall or greenery for spring. Regularly dust and inspect your shelves for signs of sagging or wear. Tighten any loose screws and touch up paint or finish as needed. These small maintenance efforts will preserve both the function and beauty of your shelves over time. A seasonal refresh also keeps your space feeling dynamic and inviting without major redecorating.
Troubleshooting Common Floating Shelf Mistakes
Even seasoned DIYers make mistakes, but being aware of common pitfalls can save you frustration. Avoid anchoring into drywall without a stud or proper anchors, which may lead to sagging or falling shelves. Don’t overload shelves beyond their weight capacity. Ensure your brackets are level before installing. Take your time with sanding and finishing for a clean result. If a shelf doesn’t fit properly, sand down tight areas or use wood filler for gaps. Remember, precision and patience go a long way. Learning from small errors makes you a better builder and ensures your shelves are not just functional, but lasting and beautiful.
Build Shelves That Reflect Your Style and Skill
Creating your own floating shelves is a fulfilling project that combines creativity, craftsmanship, and practicality. Whether you're making one shelf or an entire wall of them, each decision from material to mounting affects the final look and function. With proper planning, the right tools, and a little patience, you can craft custom shelves that reflect your unique style while enhancing your home's utility. DIY floating shelves empower you to maximize space, personaliz decor, and learn valuable woodworking skills along the way. They’re not just places to put things they’re expressions of design and self-reliance. So go ahead, turn your walls into showcases of your imagination, and enjoy the satisfaction of building something both beautiful and useful with your own two hands.
Credit:
Photo by Derick McKinney on Unsplash
What's Your Reaction?